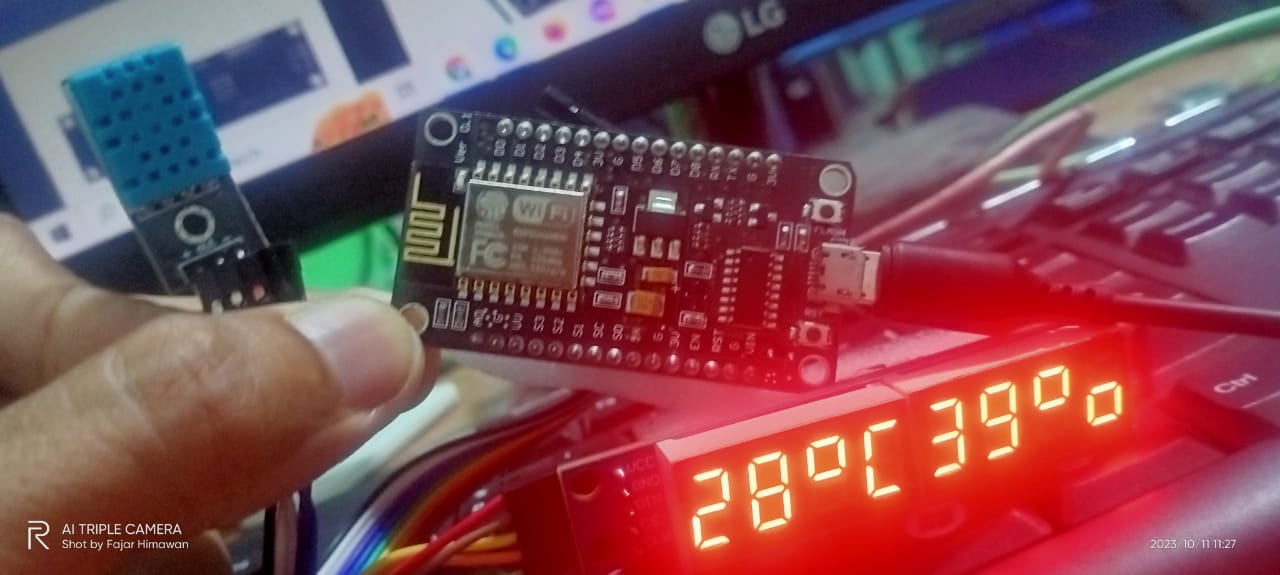
Sensor Suhu dan Kelembaban DHT11 dan Display 7 Segments
Coding:
/*
Project: Temperature and Humidity meter with seven segment display
Description: Uses the LedControl library and Adafruit's DHT sensor
library for reading temperature and humidity measurements from DHT11
sensor and displaying the result on MAX7219-driven seven segment LED
displays.
Posted on: Jurnalku by Fajar Himawan
URL of the project: https://ayojurnalku.blogspot.com
*/
#include "DHT.h"
#include "LedControl.h"
#define DHTPIN D4 // what pin we're connected to
#define VCCPIN D3 //
#define DHTTYPE DHT11 // DHT 11
// Connect pin 1 (on the left) of the sensor to Pin D4 of ESP8266
// Connect pin 2 of the sensor to whatever your Pin D3 of ESP8266
// Connect pin 4 (on the right) of the sensor to GROUND
int tempC, rh;
DHT dht(DHTPIN, DHTTYPE);
LedControl lc=LedControl(D7,D5,D8,0); // Pin D7 to Data In, D5 to Clk, D8 to LOAD
void setup() {
pinMode(VCCPIN, OUTPUT);
digitalWrite(VCCPIN, HIGH);
Serial.begin(9600);
Serial.println("DHTxx test!");
dht.begin();
lc.shutdown(0,false);// turn off power saving, enables display
lc.setIntensity(0,12);// sets brightness (0~15 possible values)
lc.clearDisplay(0);// clear screen
}
void loop() {
// Reading temperature or humidity takes about 250 milliseconds!
// Sensor readings may also be up to 2 seconds 'old' (its a very slow sensor)
float h = dht.readHumidity();
float t = dht.readTemperature();
tempC = (int)t;
rh = (int)h;
// check if returns are valid, if they are NaN (not a number) then something went wrong!
if (isnan(t) || isnan(h)) {
Serial.println("Failed to read from DHT");
} else {
Serial.print("Humidity: ");
Serial.print(rh);
Serial.print(" %\t");
Serial.print("Temperature: ");
Serial.print(tempC);
Serial.println(" *C");
Disp_Data();
delay(1000);
}
}
void Disp_Data(){
int ones, tens;
// First display temperature in row right
ones = tempC%10;
tens = (tempC/10)%10;
lc.setDigit(0,7,(byte)tens,false);
lc.setDigit(0,6,(byte)ones,false);
lc.setRow(0,5,B01100011);
lc.setRow(0,4,B01001110);
// Now display RH in row left
ones = rh%10;
tens = (rh/10)%10;
lc.setDigit(0,3,(byte)tens,false);
lc.setDigit(0,2,(byte)ones,false);
lc.setRow(0,1,B01100011);
lc.setRow(0,0,B00011101);
}
Coding 2 dg LCD i2c:
#include <Wire.h>
#include <LiquidCrystal_I2C.h>
#include "DHT.h"
LiquidCrystal_I2C lcd(0x27,16,4);
// Deklarasi PIN DHT11 //
#define DHTPIN D4
// Tipe sensor yang digunakan (DHT11 atau DHT22) //
#define DHTTYPE DHT11
DHT dht(DHTPIN, DHTTYPE);
// Membuat ikon kelelembaban //
byte suhu[8] =
{
B00100,
B01010,
B01010,
B01110,
B11111,
B11111,
B01110,
B00000
};
// Membuat ikon kelelembaban //
byte kelembaban[8] =
{
B00100,
B01010,
B01010,
B10001,
B10001,
B10001,
B01110,
B00000
};
void setup() {
lcd.init();
lcd.begin(16,2);
lcd.backlight();
lcd.createChar(1, kelembaban);
lcd.createChar(2, suhu);
lcd.setCursor(0,0);
lcd.print("FajarHimawan");
lcd.setCursor(0,1);
lcd.print("DHT11 + LCD 16x2");
dht.begin();
delay(2000);
lcd.clear();
lcd.setCursor(0,0);
lcd.write(2);
lcd.print(" Suhu: ");
lcd.setCursor(0,1);
lcd.write(1);
lcd.print(" Lembab: ");
}
void loop() {
// Membaca kelembaban //
float h = dht.readHumidity();
// Membaca suhu dalam satuan Celsius //
float t = dht.readTemperature();
// Membaca suhu dalam satuan Fahrenheit //
float f = dht.readTemperature(true);
// Menampilkan pesan Error jika sensor tidak terbaca //
if (isnan(h) || isnan(t) || isnan(f)) {
lcd.setCursor(8,0);
lcd.print("Error ");
lcd.setCursor(10,1);
lcd.print("Error ");
return;
}
float hif = dht.computeHeatIndex(f, h);
float hic = dht.computeHeatIndex(t, h, false);
// Menampilkan data ke LCD //
lcd.setCursor(8,0);
lcd.print(t,1);
lcd.print((char)223);
lcd.print("C ");
lcd.setCursor(10,1);
lcd.print(h,0);
lcd.print("% ");
// Jeda Waktu, ubah menjadi 2000 untuk DHT22//
delay(1000);
}


No comments